LAMP is generally stands for “Linux, Apache, MySQL (Maria-DB), and PHP”
LAMP is an open source Web development platform that uses Linux as the operating system,
Apache as the Web server, MySQL as the relational database management system and PHP as the object-oriented scripting language.

Step 1: Install a UNIX/Linux server.
I am using SUSE Linux operating system.
Step 2: Install Apache server.
Command:# zypper install httpd

Step 3: Create a symlinks to start & stop the apache through services.
Command:# systemctl enable apache2

Step 4: Start the Apache services.
Command:# systemctl start apache2

Step 5: Check the repos of suse linux.
Command:# zypper repos

Step 6: refresh the repos.
Command:# zypper refresh

Step 7: Install "php" libraries.
Command:# zypper in php5*

Step 8: Check information pattern of lamp server.
Command:# zypper info -t pattern lamp_server

Step 9: Install lamp server pattern. & press y to view the notification for Database.
Command:# zypper in -t pattern lamp_server


Step 10: Start the mysql database.
Command:# rcmysql start
Step 11: Check the status for mysql database.
Command:# rcmysql status
Command:# chkconfig -a mysql

Step 12: Set a password for root user in database.
Command:# '/usr/bin/mysqladmin' -u root password 'suse'
You also change the database password through below command.
Command: # '/usr/bin/mysql_secure_installation'

Step 13: Create a new php page on apache.
Command:# vi /srv/www/htdocs/info.php
<?php
phpinfo();
?>

Also, un-comment the 873 line on below located php.ini file
Command:# vi /etc/php5/apache2/php.ini
872 ;extension=php_ldap.dll
873 extension=php_mbstring.dll
874 ;extension=php_exif.dll

Step 14: enable php5 module to use in apache configuration.
Command:# a2enmod php5
Step 15: Restart the apache2 service & Check the apache url.
Command:# systemctl restart apache2.service
Step 16: Give full permission to php5 libraries.
Command:# chmod -R 777 /var/lib/php5/
Command:# systemctl restart apache2

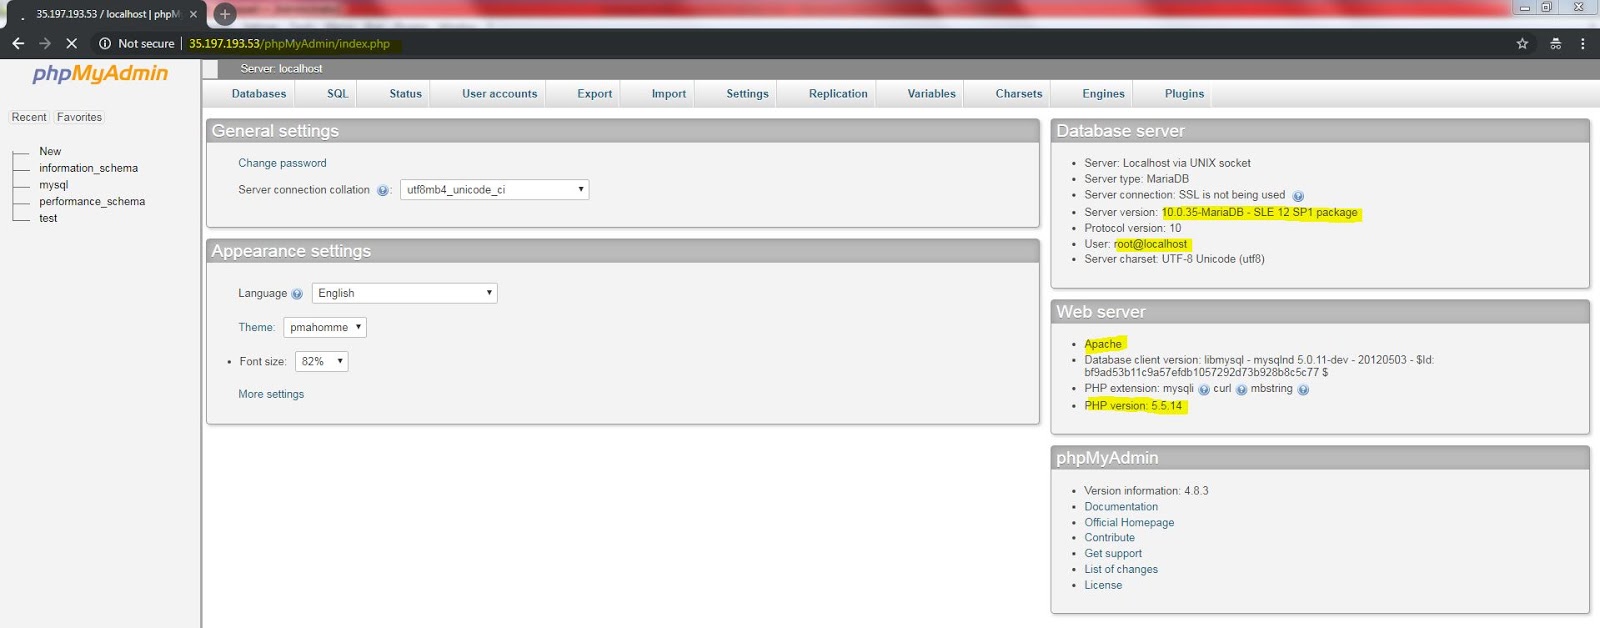
Step 17: Now, We have to install phpMyAdmin & pwgen repos lib files.
Use below link to download:
https://drive.google.com/open?id=1xlHmFOa8B7MjUrInx-Eq3jygEXk-Hksq
https://drive.google.com/open?id=1xkQXBVpzV1OnsC9d_hcrcTIXGm9LbKvd
Step 18: Install both the rpm pwgen & phpMyAdmin libraries.
Command:# rpm -ivh pwgen-2.07-3.1.x86_64.rpm
Command:# rpm -ivh phpMyAdmin-4.8.3-29.1.noarch.rpm
Command:# systemctl restart apache2


Step 19: Using Opensource "osticket" application , a real time example.
Download link:# https://osticket.com/download/
Unzip the osTicket-v1.10.4.zip & move the upload folder to Apache "/srv/www/htdocs/"
& rename as osticket

Step 20 : Now, you have successfully installed osTicket on LAMP.


Thanks :-)
No comments:
Post a Comment