Menu

Showing posts with label nginx. Show all posts

15 Jun 2026

πŸ›‘️ API Authentication & API Gateway Security Explained - Part 6

API Authentication & API Gateway Security Explained
  • Welcome to Part 6 of the Authentication & Identity Security series.
  • This article explains how APIs are authenticated and protected in enterprise environments.
  • Designed for Middleware, DevOps, Cloud, API, and Application Support Engineers.
  • Includes examples using API Keys, Basic Authentication, JWT, OAuth2, API Gateway, Azure API Management, NGINX, and backend services.


Introduction

In Part 5, we compared JWT, Sessions, and Cookies. Now we will move one level deeper into API security.

Modern applications commonly expose REST APIs for mobile apps, web apps, partner integrations, microservices, automation tools, and cloud platforms. These APIs must be protected so that only trusted users, systems, or applications can access them.

Key Concept:
API Authentication verifies who is calling the API before allowing access to backend services.

What is API Authentication?

API Authentication is the process of verifying the identity of a client application, user, service account, or system before allowing it to call an API.

API consumers may include:

  • Web applications
  • Mobile applications
  • Partner systems
  • Microservices
  • Automation scripts
  • CI/CD tools
  • Monitoring tools

Simple API Flow

Client Application
        │
        ▼
Authentication Credential
        │
        ▼
API Gateway / API Server
        │
        ▼
Credential Validation
        │
        ▼
Backend Service Access

Why API Authentication is Important

APIs expose business data and backend functions. Without proper authentication, attackers or unauthorized systems may call sensitive APIs.

  • Protects customer and business data
  • Prevents unauthorized API access
  • Supports audit and compliance requirements
  • Protects backend services from misuse
  • Enables secure partner and system integration
  • Supports identity-based access control
Enterprise View:
In production environments, APIs are usually protected using a combination of authentication, authorization, rate limiting, logging, WAF, and API Gateway policies.

Common API Authentication Methods

Method Common Usage Security Level
API Key Simple application identification Basic
Basic Authentication Legacy/internal APIs Low to Medium
JWT Bearer Token Modern APIs and microservices High
OAuth2 Enterprise delegated access High
mTLS System-to-system authentication Very High

API Key Authentication

API Key authentication uses a unique key to identify the application or client calling the API.

Example

GET /api/customer HTTP/1.1
Host: api.company.com
x-api-key: 9f8a7b6c5d4e

The API Gateway or backend API validates the key before processing the request.

Advantages

  • Simple to implement
  • Useful for internal or low-risk APIs
  • Good for identifying applications

Limitations

  • Does not identify the actual user
  • Can be leaked if stored insecurely
  • Should not be used alone for sensitive APIs

Basic Authentication

Basic Authentication sends username and password encoded in the Authorization header.

Example

Authorization: Basic base64(username:password)

Although the value is encoded, it is not encrypted. Therefore, Basic Authentication must always be used only over HTTPS.

Security Note:
Basic Authentication is simple but not recommended for modern public APIs unless combined with HTTPS, strong password policy, and additional controls.

JWT Bearer Token Authentication

JWT Bearer Token authentication is commonly used in modern APIs.

After successful login, the client receives a JWT access token and sends it with every API request.

Example API Request

GET /api/policies HTTP/1.1
Host: api.company.com
Authorization: Bearer eyJhbGciOiJIUzI1NiIs...

Validation Performed by API

  • Validate token signature
  • Check token expiry
  • Validate issuer
  • Validate audience
  • Check user roles or claims
Middleware View:
JWT validation can be performed at API Gateway, reverse proxy, application middleware, or backend service level.

OAuth2 API Authentication

OAuth2 is commonly used when an application needs delegated access to protected APIs.

Instead of sharing user passwords with APIs, the application receives an access token from an authorization server.

OAuth2 API Flow

Client Application
        │
        ▼
Authorization Server
        │
        ▼
Access Token Issued
        │
        ▼
API Request With Bearer Token
        │
        ▼
Protected API

Common OAuth2 Components

  • Client: Application requesting access
  • Resource Owner: User or account owner
  • Authorization Server: Issues tokens
  • Resource Server: API being accessed

OAuth2 is commonly used with Azure Entra ID, identity providers, API Gateways, and enterprise SSO platforms.


OAuth2 vs JWT

Many engineers confuse OAuth2 and JWT and assume they are the same thing. They are related but serve different purposes.

Simple Rule:
OAuth2 is the process used to obtain access tokens.
JWT is a token format commonly used for those access tokens.

Airport Analogy

  • OAuth2 = Security verification process
  • JWT = Boarding pass issued after verification

OAuth2 Flow

User
  │
  ▼
Application
  │
  ▼
Authorization Server
  │
  ▼
User Login & Consent
  │
  ▼
Access Token Issued

JWT Example

Header.Payload.Signature

JWT defines the structure of the token. OAuth2 defines how the token is obtained.

Azure Example

User
 │
 ▼
Microsoft Entra ID
 │
OAuth2 Authorization Flow
 │
 ▼
JWT Access Token
 │
 ▼
Azure API Management
 │
 ▼
Backend API
OAuth2JWT
Authorization FrameworkToken Format
Defines how tokens are obtainedDefines token structure
Handles login and consent flowContains claims and signature
Can issue JWT or opaque tokensDoes not define login process
Used by Entra ID, Okta, KeycloakCommon access token format
Interview Answer:
OAuth2 is an authorization framework that defines how applications obtain access tokens. JWT is a token format commonly used to represent those access tokens.

What is an API Gateway?

An API Gateway is a centralized entry point for APIs. It sits between clients and backend services.

Client
  │
  ▼
API Gateway
  │
  ▼
Backend API / Microservice

Instead of exposing backend services directly, organizations expose APIs through an API Gateway.

Common API Gateway Products

  • Azure API Management
  • AWS API Gateway
  • Apigee
  • Kong Gateway
  • NGINX
  • IBM API Connect

API Gateway Security Controls

API Gateways provide multiple security and governance controls.

  • API authentication
  • JWT validation
  • OAuth2 integration
  • API key validation
  • Rate limiting
  • IP whitelisting
  • Request validation
  • Header validation
  • WAF integration
  • Logging and monitoring
  • Backend routing
  • Throttling and quota management
Production Tip:
Do not expose backend APIs directly to the internet. Use API Gateway, WAF, authentication policies, logging, and rate limiting.

Enterprise Architecture Example

Mobile App / Web App / Partner System
              │
              ▼
        WAF / CDN Layer
              │
              ▼
        API Gateway
              │
     ┌────────┼────────┐
     │        │        │
 JWT Validation   Rate Limit   Logging
     │        │        │
     └────────┼────────┘
              │
              ▼
       Backend API Service
              │
              ▼
       Database / Core System

In this model, API Gateway validates the caller before forwarding traffic to backend services.

Benefits

  • Centralized security enforcement
  • Reduced backend exposure
  • Improved monitoring and auditability
  • Better control over partner integrations
  • Reusable authentication and authorization policies

Azure API Management Example

Azure API Management can secure APIs using subscription keys, JWT validation, OAuth2 integration, and backend policies.

Typical Flow

Client Application
        │
        ▼
Azure API Management
        │
        ▼
Validate JWT / API Key
        │
        ▼
Azure App Service / AKS / VM API

Common Azure API Management Controls

  • Subscription key validation
  • JWT validation policy
  • OAuth2 / OpenID Connect integration
  • IP filtering
  • Rate limiting
  • Request and response transformation
  • Backend routing

JWT Header Example

Authorization: Bearer eyJhbGciOiJIUzI1NiIs...

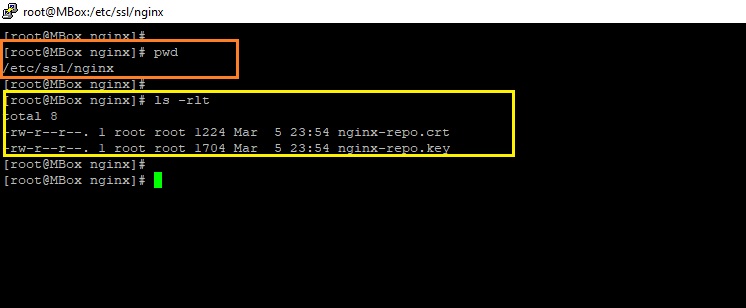
NGINX / Reverse Proxy Example

NGINX can be used as a reverse proxy in front of backend APIs. It can enforce TLS, route traffic, validate headers, limit requests, and integrate with authentication services.

Client
  │
  ▼
NGINX Reverse Proxy
  │
  ▼
Tomcat / JBoss / Spring Boot API

Common NGINX API Security Use Cases

  • HTTPS termination
  • Header forwarding
  • Rate limiting
  • IP allowlist / denylist
  • Reverse proxy routing
  • Basic authentication for internal APIs

Authentication Method Comparison

Method Best For Strength Limitation
API Key Application identification Simple and fast Does not identify user
Basic Auth Legacy/internal APIs Easy to implement Password exposure risk if misused
JWT Modern APIs Stateless and scalable Token theft and expiry handling
OAuth2 Delegated access Enterprise-grade authorization More complex setup
mTLS System-to-system APIs Strong certificate-based trust Certificate lifecycle management

Common API Authentication Issues

Issue Possible Cause
401 Unauthorized Missing, expired, or invalid token
403 Forbidden User authenticated but not authorized
Invalid API key Wrong key or inactive subscription
Invalid JWT signature Wrong signing key or modified token
Audience validation failed Token issued for different API
Rate limit exceeded Too many requests from client
CORS issue Browser blocked cross-origin API request

Best Practices

  • Always use HTTPS for API communication.
  • Do not expose backend APIs directly to the internet.
  • Use API Gateway for centralized authentication and policy enforcement.
  • Use JWT or OAuth2 for modern APIs.
  • Keep access tokens short-lived.
  • Validate issuer, audience, expiry, and signature.
  • Use API keys only for application identification or low-risk APIs.
  • Apply rate limiting and throttling.
  • Log API access for audit and troubleshooting.
  • Use WAF for internet-facing APIs.
  • Rotate secrets, API keys, and certificates regularly.

Key Takeaways

  • API Authentication verifies who is calling the API.
  • API Keys are simple but not enough for sensitive APIs.
  • Basic Authentication should be avoided for modern public APIs unless strongly protected.
  • JWT Bearer Tokens are widely used for modern API authentication.
  • OAuth2 is used for delegated access and enterprise integrations.
  • API Gateways centralize authentication, routing, monitoring, and security policies.
  • Azure API Management, NGINX, Apigee, Kong, and IBM API Connect are common gateway solutions.

What’s Next?

Next Article:
Part 7 – OAuth2, OpenID Connect (OIDC) & SAML Explained

In the next article, we will understand OAuth2, OIDC, and SAML, and how these protocols are used in enterprise SSO, API access, and identity federation.


Series: Authentication & Identity Security for Middleware, DevOps & Cloud Engineers
Author: Pradeep V
Blog: MiddlewareBox.com


2 Nov 2025

🐧 Linux Shell Scripting for Beginners – Complete Tutorial Series.

  • A 13-part practical shell scripting course for DevOps and Middleware Engineers.

πŸ’‘ How This Tutorial Series Will Help You

  • ✔ Build a strong foundation in Linux Shell scripting — from basics to automation.
  • ✔ Automate daily Middleware and DevOps tasks: monitoring, backups, and log management.
  • ✔ Write scripts for Middleware platforms like Tomcat, Jenkins, and WebSphere.
  • ✔ Debug, schedule, and manage production-ready shell scripts confidently.
  • ✔ Perfect for Sysadmins, Middleware, and DevOps Engineers upgrading to Cloud roles.

πŸ“š Complete Course Index

🐚 Part 1: What is a Variable?
Learn how variables store data and simplify automation scripts. Foundation of all shell logic.
πŸ“₯ Part 2: Reading User Input in Shell
Make interactive scripts using read command with Jenkins and Tomcat examples.
Use decision-making in your scripts with examples checking files, services, and network health.
Automate repetitive DevOps tasks like log cleanup, backups, and status monitoring.
Write modular, reusable functions — restart Tomcat or back up Jenkins in one click.
πŸ“¦ Part 6: Arrays & Arguments
Store multiple values, manage user inputs, and process server lists in scripts.
πŸ“ Part 7: File Handling in Shell
Learn how to read, write, append, and handle configuration or log files safely.
πŸ’‘ Part 8: Debugging & Logging
Find and fix script errors, use logs, and enable debug mode for safe execution.
πŸ•’ Part 9: Scheduling & Automation
Use cron and @reboot jobs to run scripts automatically for health checks or backups.
Create a production-ready monitoring script for Tomcat, Jenkins, and NGINX with auto-restart.
🧾 Part 11: Log Management & Rotation
Automate log rotation with logrotate and custom retention scripts for Middleware systems.
Perform automated backup and restore for Jenkins, Tomcat, and WebSphere with rollback support.
Run multiple jobs in parallel, monitor background processes, and speed up automation workflows.

πŸš€ Why MiddlewareBox Shell Scripting Series?

  • ✅ Step-by-step, beginner-friendly explanations.
  • ✅ Each topic includes real DevOps & Middleware context.
  • ✅ Examples with Output and Error handling.
  • ✅ Simple language for better understanding.

✨ Start Learning Now → Part 1: What is a Variable?
& build your own scripts from scratch! πŸ’ͺ

1 Nov 2025

πŸ’‘Shell Scripting for Beginners – Part 8: Debugging & Logging

  • By now, your scripts deploy apps, manage servers, and clean logs.
  • But what happens when things go wrong?
  • Welcome to Debugging & Logging, where we make your scripts smarter and traceable like a pro DevOps engineer! πŸ•΅️‍♂️

πŸ“‘ Table of Contents


🐞 1️⃣ Debugging with set -x

set -x shows every command the script executes — perfect for troubleshooting silent errors.

#!/bin/bash
set -x  # enable debugging
echo "Starting deployment..."
mkdir /opt/app/deploy
cp /tmp/app.war /opt/app/deploy/
set +x  # disable debugging
echo "Deployment finished!"
πŸ’¬ Output:
+ echo "Starting deployment..."
Starting deployment...
+ mkdir /opt/app/deploy
+ cp /tmp/app.war /opt/app/deploy/
+ echo "Deployment finished!"
Deployment finished!
πŸ’‘ Use bash -x script.sh to debug a script without editing it.

πŸͺ€ 2️⃣ Using trap to Handle Failures

The trap command catches unexpected exits (Ctrl+C, errors) and executes custom recovery code. Perfect for cleanup or service restarts.

#!/bin/bash
trap 'echo "⚠️ Script interrupted! Cleaning up..."; rm -f /tmp/tempfile' EXIT
echo "Creating temporary file..."
touch /tmp/tempfile
echo "Simulating work..."
sleep 3
exit 1  # simulate failure
πŸ’¬ Output:
Creating temporary file...
Simulating work...
⚠️ Script interrupted! Cleaning up...
πŸ’‘ Always trap EXIT or ERR to prevent orphan temp files or hanging processes.

πŸšͺ 3️⃣ Exit Codes & Error Messages

Every command returns an exit code — 0 means success, non-zero means failure.

#!/bin/bash
cp /tmp/app.war /opt/app/deploy/
if [ $? -ne 0 ]; then
  echo "❌ Copy failed! Check file path or permissions."
  exit 1
else
  echo "✅ Copy successful!"
fi
πŸ’¬ Output:
❌ Copy failed! Check file path or permissions.
or
✅ Copy successful!
Use echo $? after any command to view its exit code.

🧾 4️⃣ Logging with Syslog & Custom Files

Example 1: Using logger Command

#!/bin/bash
logger "Starting Middleware backup..."
tar -czf /tmp/backup.tar.gz /opt/middleware/ || logger "Backup failed!"
logger "Middleware backup completed!"
πŸ’¬ Syslog Output (in /var/log/syslog):
Nov 1 02:15:00 server logger: Starting Middleware backup...
Nov 1 02:15:03 server logger: Middleware backup completed!

Example 2: Redirecting Logs to a File

#!/bin/bash
exec >> /opt/logs/deploy.log 2>&1
echo "[$(date)] Starting deployment..."
echo "[$(date)] Copying WAR..."
cp /tmp/app.war /opt/tomcat/webapps/
echo "[$(date)] Deployment done ✅"
πŸ’¬ deploy.log Content:
[Sat Nov 1 02:20:00 2025] Starting deployment...
[Sat Nov 1 02:20:01 2025] Copying WAR...
[Sat Nov 1 02:20:02 2025] Deployment done ✅

⚙️ 5️⃣ Real Middleware & DevOps Examples

Example 1: Jenkins Job Failure Recovery

#!/bin/bash
set -e
trap 'echo "🚨 Jenkins build failed, restarting service..."; systemctl restart jenkins' ERR
curl -s -X POST "http://localhost:8080/job/myjob/build" || false
echo "✅ Jenkins job triggered successfully!"
πŸ’¬ Output:
🚨 Jenkins build failed, restarting service...
✅ Jenkins job triggered successfully!

Example 2: Tomcat Log Watcher with Debug Info

#!/bin/bash
set -x
tail -Fn0 /opt/tomcat/logs/catalina.out | \
while read line; do
  echo "$line" | grep "ERROR" &>/dev/null && echo "πŸ”₯ Found error: $line" >> /opt/logs/tomcat_error.log
done
πŸ’¬ Output:
[DEBUG] + grep "ERROR" catalina.out
πŸ”₯ Found error: Database connection timeout

Example 3: NGINX Health Check with Logging

#!/bin/bash
while true; do
  if ! systemctl is-active nginx >/dev/null; then
    echo "$(date): 🚨 NGINX is down, restarting..." >> /var/log/nginx_monitor.log
    systemctl restart nginx
  fi
  sleep 10
done
πŸ’¬ Log Output:
Sat Nov 1 03:00:00 2025: 🚨 NGINX is down, restarting...

🏁 Summary

  • set -x → Debug command execution flow.
  • trap → Catch exits & clean up automatically.
  • exit codes → Detect and handle failures gracefully.
  • logger → Send messages to syslog or custom logs.
  • πŸ’‘ Always include logging in production-ready scripts for audit and rollback.

πŸ“ Shell Scripting for Beginners – Part 7: File Handling in Shell.

  • In Middleware & DevOps automation, file handling is everywhere — reading logs, writing reports, rotating backups, or watching live output.
  • Let's learn how to read, write, append, and monitor files in shell scripts with real-world Middleware examples.

πŸ“‘ Table of Contents


πŸ“– 1️⃣ Reading Files

Example 1: Read File Line by Line

#!/bin/bash
filename="/opt/scripts/serverlist.txt"
while read -r line; do
  echo "Processing server: $line"
done < "$filename"
πŸ’¬ Output:
Processing server: app1
Processing server: app2
Processing server: app3

Example 2: Display Tomcat Log Errors

#!/bin/bash
grep "ERROR" /opt/tomcat/logs/catalina.out
πŸ’¬ Output:
ERROR [localhost-startStop-1] ... Application failed to start
ERROR [main] ... Database connection refused
πŸ’‘ Tip: Use grep -i error to ignore case.

✍️ 2️⃣ Writing & Appending Files

Example 3: Write Output to File

#!/bin/bash
echo "Backup started at $(date)" > /opt/scripts/backup.log
echo "Compressing files..." >> /opt/scripts/backup.log
tar -czf /tmp/backup.tar.gz /opt/data && echo "Backup successful" >> /opt/scripts/backup.log
πŸ’¬ Output File Content:
Backup started at Sat Nov 1 02:00:00 IST 2025
Compressing files...
Backup successful

Example 4: Append Deployment Status

#!/bin/bash
env=$1
status=$2
echo "$(date) - $env deployment $status" >> /opt/scripts/deploy_history.log
πŸ’¬ Output File Content:
Sat Nov 1 02:15:00 IST 2025 - dev deployment SUCCESS
Sat Nov 1 02:17:00 IST 2025 - prod deployment FAILED

Example 5: Log WebSphere Cleanup Activity

#!/bin/bash
logfile="/opt/IBM/WebSphere/AppServer/logs/cleanup.log"
echo "$(date): Cleaning old logs..." >> $logfile
find /opt/IBM/WebSphere/AppServer/logs -type f -mtime +7 -delete && echo "✅ Logs cleaned" >> $logfile
πŸ’¬ Output File:
Sat Nov 1 02:30:00 IST 2025: Cleaning old logs...
✅ Logs cleaned

πŸ” 3️⃣ Monitoring Log Files

Example 6: Live Tail of Tomcat Logs

#!/bin/bash
echo "Monitoring Tomcat logs..."
tail -f /opt/tomcat/logs/catalina.out
πŸ’¬ Output:
Monitoring Tomcat logs...
[INFO] Server startup completed in 2200 ms
[WARN] Deprecated API in use
[ERROR] Connection timeout to DB

Example 7: Auto-restart Jenkins on Log Failure

#!/bin/bash
tail -Fn0 /var/log/jenkins/jenkins.log | \
while read line; do
  echo "$line" | grep "ERROR" &>/dev/null
  if [ $? = 0 ]; then
    echo "🚨 Error detected, restarting Jenkins..."
    systemctl restart jenkins
  fi
done
πŸ’¬ Output:
[ERROR] Jenkins job queue stuck
🚨 Error detected, restarting Jenkins...

Example 8: Monitor NGINX Access Logs for High Load

#!/bin/bash
tail -n 100 /var/log/nginx/access.log | awk '{print $9}' | sort | uniq -c
πŸ’¬ Output:
500 3
404 7
200 90
301 5
πŸ’‘ Tip: Use this for quick traffic analysis on your Middleware or DevOps pipeline servers.

⚠️ 4️⃣ Error Handling & Debugging

  • Use set -e to exit on first failure.
  • Redirect errors → 2>> error.log to capture exceptions.
  • Validate file existence before reading:
if [ ! -f "$filename" ]; then
  echo "❌ File not found: $filename"
  exit 1
fi
If your script suddenly exits, check for missing files or permission issues in /var/log/messages or your custom error log.

🏁 Summary

  • Read files line by line to automate configuration or host processing.
  • Write and append logs for auditing and historical tracking.
  • Monitor live logs (Tomcat, Jenkins, NGINX) using tail -f.
  • Add error handling to avoid silent file issues in production.

πŸ“¦ Shell Scripting for Beginners – Part 6: Arrays & Arguments

Arrays and arguments give your scripts flexibility — perfect for automating Middleware & DevOps tasks like restarting Tomcat across servers, cleaning WebSphere logs, or passing dynamic inputs to Jenkins jobs.


πŸ“‘ Table of Contents


1️⃣ Arrays in Shell

🎯 Example 1 – Basic Array

#!/bin/bash
servers=("dev" "stage" "prod")
echo "First server: ${servers[0]}"
echo "All servers: ${servers[@]}"
πŸ’¬ Output:
First server: dev
All servers: dev stage prod

πŸ” Example 2 – Loop through Array

#!/bin/bash
apps=("Tomcat" "WebSphere" "JBoss")
for app in "${apps[@]}"; do
  echo "Managing $app service..."
done
πŸ’¬ Output:
Managing Tomcat service...
Managing WebSphere service...
Managing JBoss service...

🧰 Example 3 – Restart Tomcat on Multiple Servers

#!/bin/bash
servers=("app1" "app2" "app3")
for s in "${servers[@]}"; do
  echo "Restarting Tomcat on $s..."
  ssh $s "systemctl restart tomcat" || echo "⚠️ Restart failed on $s"
done
echo "✅ Restart loop completed."
πŸ’¬ Output:
Restarting Tomcat on app1...
Restarting Tomcat on app2...
⚠️ Restart failed on app3
✅ Restart loop completed.

🧹 Example 4 – Cleanup WebSphere Logs

#!/bin/bash
logs=(SystemOut.log SystemErr.log activity.log)
for file in "${logs[@]}"; do
  echo "Deleting $file..."
  rm -f /opt/IBM/WebSphere/AppServer/logs/$file || echo "⚠️ Could not remove $file"
done
echo "🧹 Old WebSphere logs removed."
πŸ’¬ Output:
Deleting SystemOut.log...
Deleting SystemErr.log...
Deleting activity.log...
🧹 Old WebSphere logs removed.

2️⃣ Command-line Arguments

πŸ“¦ Example 5 – Access Arguments

#!/bin/bash
echo "Environment: $1"
echo "Version: $2"
πŸ’¬ Output:
$ ./deploy.sh prod v2.0
Environment: prod
Version: v2.0

πŸš€ Example 6 – Trigger Jenkins Job

#!/bin/bash
job_name=$1
if [ -z "$job_name" ]; then
  echo "❌ Usage: $0 "
  exit 1
fi
curl -s -X POST "http://localhost:8080/job/$job_name/build?token=deploy123" || echo "⚠️ Failed to trigger job."
πŸ’¬ Output:
$ ./jenkins_trigger.sh BuildApp
✅ Triggered Jenkins job BuildApp

🧠 Example 7 – Argument Validation

#!/bin/bash
if [ $# -lt 2 ]; then
  echo "Usage: $0  "
  exit 1
fi
echo "Deploying $1 version $2..."
πŸ’¬ Output:
$ ./deploy.sh myapp v1.5
Deploying myapp version v1.5...

3️⃣ Combining Arrays & Arguments

🌍 Example 8 – Check NGINX on Multiple Hosts

#!/bin/bash
hosts=("$@")
for h in "${hosts[@]}"; do
  echo "Checking NGINX on $h..."
  ssh $h "systemctl is-active nginx" >/dev/null 2>&1 && echo "✅ $h OK" || echo "❌ $h DOWN"
done
πŸ’¬ Output:
$ ./check_nginx.sh host1 host2 host3
✅ host1 OK
✅ host2 OK
❌ host3 DOWN

πŸ’Ύ Example 9 – Query Multiple Databases

#!/bin/bash
dbs=("salesdb" "hrdb" "logdb")
for db in "${dbs[@]}"; do
  echo "Checking $db connection..."
  mysql -h dbserver -u admin -psecret -e "use $db;" >/dev/null 2>&1 && echo "✅ $db reachable" || echo "⚠️ $db not reachable"
done
πŸ’¬ Output:
Checking salesdb connection... ✅ salesdb reachable
Checking hrdb connection... ⚠️ hrdb not reachable
Checking logdb connection... ✅ logdb reachable

🧩 Example 10 – CI/CD Pipeline Trigger

#!/bin/bash
branches=("main" "dev" "hotfix")
for b in "${branches[@]}"; do
  echo "Triggering pipeline for $b..."
  curl -s -X POST "https://ci.middlewarebox.com/job/build-$b/build" || echo "⚠️ Failed for $b"
done
πŸ’¬ Output:
Triggering pipeline for main... ✅ Done
Triggering pipeline for dev... ✅ Done
Triggering pipeline for hotfix... ⚠️ Failed for hotfix

4️⃣ Error Handling & Debugging

  • Use set -x to trace executed commands.
  • Check argument count with $#.
  • Use "$@" to safely pass all args to loops.
  • Handle SSH/curl/mysql failures with || and echo messages.
  • Log outputs → script.sh >> /var/log/script.log 2>&1

🏁 Summary

  • Arrays – store lists of servers, apps, or files.
  • Arguments – pass values into scripts for dynamic execution.
  • Combine both for multi-server automation.
  • Always include error handling to avoid silent failures.

6 Mar 2020

Install Nginx plus on RHEL 7.4+ / CentOS 7.4+ / Oracle Linux 7.4+

What is NGINX Plus?

  • NGINX Plus is a software load balancer, web server, and content cache built on top of open source NGINX. 
  • NGINX Plus has exclusive enterprise‑grade features beyond what's available in the open-source offering, including session persistence, configuration via API, and active health checks. 
  • Use NGINX Plus instead of your hardware load balancer and get the freedom to innovate without being constrained by infrastructure.


Step 1: Open the Nginx Plus URL link: https://cs.nginx.com/repo_setup


Step 2: Choose your OS and distribution (RHEL 7.4+ in my case).


Choose Enterprise version OR you need to choose free trial request for 30 days URL    

 https://www.nginx.com/free-trial-request


step 4: Register and you will receive a trail mail for 30 days, from there need to download nginx-repo.key & nginx-repo.crt files. 


  • Reference mail to download "nginx-repo.crt" & "nginx-repo.key" file


**********************************************************
Since this first installation, you will face "No such file or directory this"

Step 1) If you already have old NGINX packages in your system, back up your configs and logs: 

Command
sudo cp -a /etc/Nginx /etc/nginx-plus-backup

sudo cp -a /var/log/nginx /var/log/nginx-plus-backup


Step 2) Create the /etc/ssl/nginx/ directory:

Command
sudo mkdir -p /etc/ssl/nginx


Step 3) Log in to NGINX Customer Portal and download the following two files.

nginx-repo.key
nginx-repo.crt


Step 4) Copy the above two files to the RHEL/CentOS/Oracle Linux server into "/etc/ssl/nginx/" directory. Use your SCP client or other secure file transfer tools.


Step 5) Install prerequisite packages.

Command:
sudo yum install ca-certificates

this step will install CA-certificates to your local OS server from REDHAT.


Step 6) Add NGINX Plus repository by downloading the file nginx-plus-7.4.repo to "/etc/yum.repos.d"

Download the "nginx-plus-7.4.repo" and copy this file to "/etc/yum.repos.d" location.


Step 7) Install the NGINX Plus package.

Command:
sudo yum install nginx-plus


Step 8) Check the nginx binary version.

Command:
nginx -v

OR

Command:
nginx -V


Step 9) start the Nginx.
Command:
nginx


Step 10) To verify that NGINX is returning requests.

Command:
curl localhost


****************************************************************


  • "Nginx" directories and its descriptions.    
Directories
Descriptions.
/etc/nginx/
Config dir.
/etc/nginx/nginx.conf
Master/Global config file.
/usr/share/nginx/html
Document root directory
/etc/nginx/conf.d
Extra configuration files.
/var/log/nginx
log location folder (access.log & error.log).
/usr/sbin/nginx
Main nginx file location.


  • "Nginx" useful commands and its descriptions.

Commands
Descriptions.
nginx -s  [signal]
Signal (Where signal may be one of the following).
nginx -s  stop
Fast Shutdown.
nginx -s quit
Graceful shutdown (to stop Nginx processes with waiting for
the worker processes to finish serving current requests).
nginx -s reload
Reloading the configuration file (Changes made in the configuration file will not be applied until the command to reload configuration is sent to Nginx or it is restarted).
nginx  -s reopen
Reopening the log files.
nginx   -t
To test the configuration file (nginx.conf).
nginx   -T
To test configuration, dump it and exit.
nginx  -V
Show the version and configure options then exit.
nginx  -v
Show version and exit.
nginx  -h
This is print help.
nginx  -c  filename
Specify which configuration file NGINX should use instead of the default.
nginx  -T | less
To test configuration, dump it &  page wise view.


Nginx-Docs link:
https://drive.google.com/drive/folders/1jg43W_m0D72tKU5yK4nVEqUuLEYy3pP9


Reference links :
https://cs.nginx.com/repo_setup
https://www.nginx.com/products/nginx/#features
https://www.nginx.com/free-trial-request
https://www.nginx.com/blog/performance-tuning-tips-tricks/

Thanks :-)